{new address}

Hi friends!  Please continue to follow {Wait Til Your Father Gets Home} at http://www.waittilyourfathergetshome.com.  Thanks for following!

Posted in Uncategorized | Leave a comment

{avocado salad}

Here’s my latest, Pinterest inspired recipe!  Can you believe that Paula Dean, the Queen of Butter, actually has a recipe that does not involve butter?  I was shocked!  Let me tell you…it was gooo-oood (cue Cousin Eddie voice from Christmas Vacation, one of the best movie characters of all time).

I made this while the hubby was down under hanging out with the roos, so I adjusted the quantity to more of a personal sized salad for little old me.  Here’s what you’ll need to make Paula Dean’s Southwestern Avocado and Black Bean Salad:

  • 1/2 cup freshly chopped cilantro leaves (you can skip these if you find cilantro disgusting)
  • 1/4 cup EVOO
  • 2 tablespoons freshly squeezed lime juice (I used one of those plastic limes with the juice already squeezed)
  • 2 or 3 dashes hot sauce (Franks!)
  • 4 cups chopped romaine lettuce
  • 2 avocados, peeled and diced
  • 2 cups summer crisp corn
  • 2 (15-ounce) cans black beans, rinsed and drained
  • 1 cup chopped cherry tomatoes
  • About 3/4 cup (3-ounces) grated pepper jack cheese
  • 1/4 cup red onion, diced
  • Kosher salt and freshly ground black pepper

I forgot to take a picture of all the pretty ingredients before hand, you get the idea though!

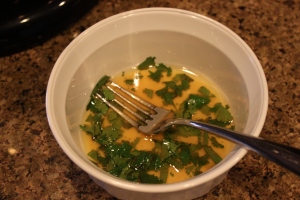
To make the dressing, whisk together in a small bowl the cilantro, EVOO, lime juice, and hot sauce, like so…

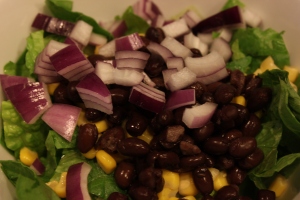
Next, add all remaining ingredients to a large salad bowl (or in my case, a small salad bowl)…

Aren’t the colors b.e.a.u.t.i.f.u.l!?

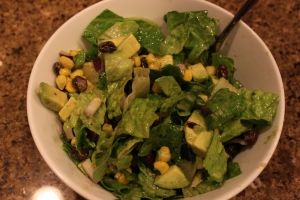
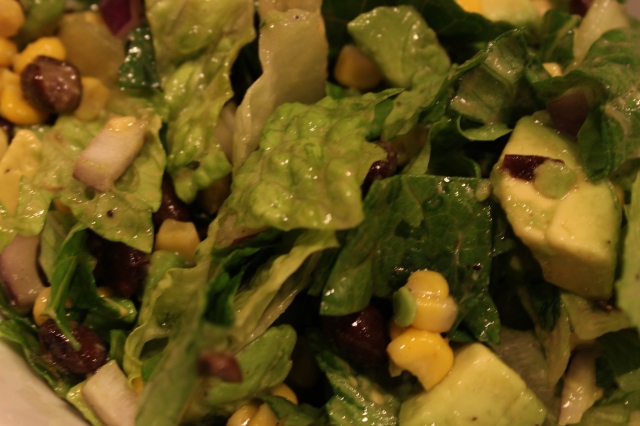
Drizzle the dressing on top and toss everything together until you get something that looks like this…

Let me tell you, not only was this salad delicious it was surprisingly filling.  I’m not usually a salad-as-my-main-dish-kinda-girl, but this one was perfect.  I think it would also taste great with some grilled chicken or shrimp and maybe even some fresh croutons for a bit of a crunch.

Thanks Mrs. Paula for your great, non-butter, recipe!

What’s your favorite salad recipe?

I’ve just linked up with these fine ladies…

on their quest to stop pinning and start doing.  It’s…

Head on over to their blogs to see what else everyone has been up to on this 80 degree “winter” day!

Katie @ Bower Power

Sherry @ Young House Love

Erin @ The Great Indoors

Cassie @ Hi Sugarplum!

Posted in Recipes | Tagged , , , | Leave a comment

{gerber baby}

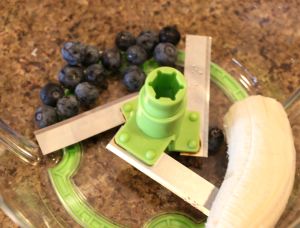
Last week I was inspired by this…


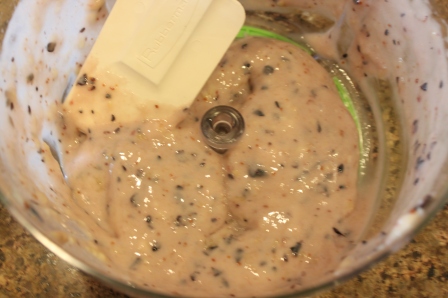
…to make this…

It tasted DELICIOUS!  (At least I thought it was)  All the recipe called for was half of a banana and two tablespoons of blueberries.  How easy (and healthy) is that?!

 I gave one bite to Jackson and knew it was a fail.  He hated it.  I couldn’t get him to eat any of it.  He LOVES Gerber bananas and he’s had a few mixed fruit blends that have blueberries in them, but hated the version that mama made.  I think for now, we’re sticking with Gerber!


Posted in Baby | Tagged , , , | 2 Comments

{you might be a redneck if…}

…..you have a garden in your bathtub!  Yes, really…a GARDEN in the bathtub!

Have you ever grown a vegetable garden?  I’ve always wanted to, but in the past when my husband and I have thought about growing one it was a little too late in the season to actually get a good garden growing.  Well, I like to think that we’re on top of things this year because I’ve been working on our first garden for over a month now…in our bathtub.  Why the bathtub you ask?  Well, the seed packets said to grow indoors, in a warm environment with some sunlight.  I figured where better than the bathtub?  You see, we don’t use it all that often, it does stay fairly warm in the bathroom (especially after two or more showers a day), and there is a window right above the bathtub that can let in some sunlight.  It really has been the perfect spot!

So we went to Lowe’s and bought a ton of vegetable seeds and some small, biodegradable, seed starter pods that eventually can all just be planted in the soil together (how easy is that?!).  I don’t have receipts, but if I had to guess we spent maybe $30 on all the seeds and the starter pods (we already had the soil on hand).

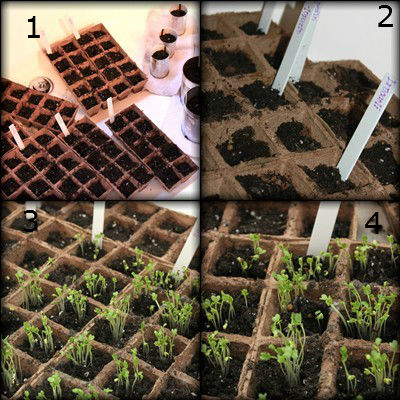
About half of the seeds we purchased suggested to grow indoors about 6-8 weeks before planting outside.  Therefore, my master bathtub is now home to this…

Pictures 1 and 2 show my little seeds on day one, freshly planted in their biodegradable pods.  I water them sparingly (and by sparingly, I mean maybe once a week, and hardly anything at all).  Within about a week, I had pictures 3 and 4.  Broccoli grows FAST!  It’s so long now that it actually flops over.  We’ve had a very warm winter in Georgia this year (now that I say that we’ll probably get snow next week).

My husband and I are looking forward to setting up our first vegetable garden on the side of our house this spring and hoping to enjoy lots of fresh, homegrown vegetables throughout the summer!  I definitely promise to share the gardening experience with all of you.  I have a question for all you green thumbs out there though…any tips?!

Posted in Inexpensive | Tagged , , , , , | Leave a comment

{piles of junk}

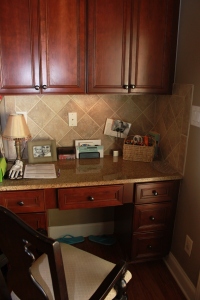
I’m not sure about you, but I love the idea of having a built in desk in the kitchen.  When we moved into our new home, I was thrilled that it had this feature.  My husband on the other hand wasn’t crazy about it because he said it would turn into a place that we dump stuff (keys, bills, unread mail, sunglasses, baby stuff…you name it really).  Well, he was right.  Our kitchen desk typically looked like this…

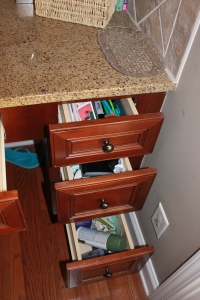
Not to mention the drawers were very unorganized and somewhat chaotic…

Random huh?

I think this side, might have been the worst!

Well, I took everything off the desk and out of the drawers and gave all surfaces a good cleaning.  I purchased a larger desk organizer from Wal-Mart for $5.99 on sale and had all other items on hand already to get organizing.

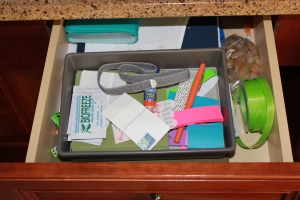
The top drawer in the middle of the desk is where I put a lot of miscellaneous items such as post its, paperclips, stamps, glue sticks, tape, scissors, etc.  It may look a little chaotic, but everything has its own container which helps immensely in my opinion.

I own a lot of scissors.

The other two top drawers hold mostly pens (also in a drawer organizer).  One side has pens, pencils, and highlighters, the other side has permanent markers and colored pens.

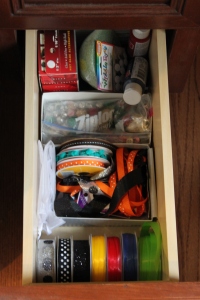
I made a drawer for crafting supplies that I use a lot.

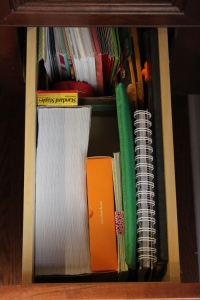
And another for stationary, envelopes, address labels, and my address book.

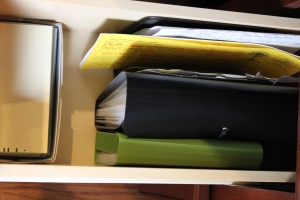
Another drawer has a file with all of our paid bills and the receipt file that I keep (to keep track of monthly spending and in case we ever have to return something).

Now, my favorite part…

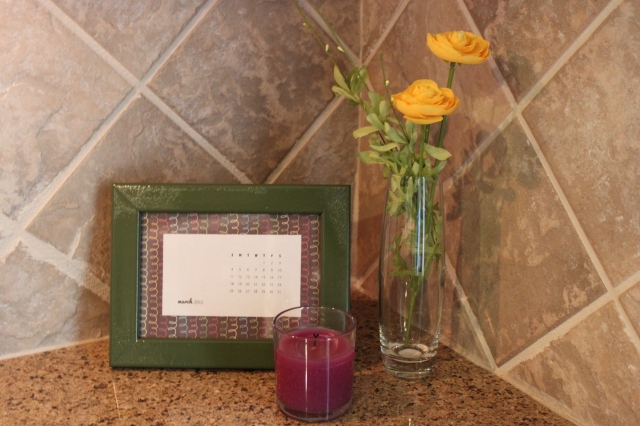
There is no more clutter on top of the desk!  I have made it a resolution to keep the desk looking this way at all times!  The only items on top of the desk are a small lamp (that I’m pretty sure was in my bedroom when I was a teenager), a giant decorative paperclip (I think that was a Home Goods find) to keep a picture or important announcements, a small bud vase (that I just won at my friend’s baby shower), a glade candle (you know I bought that with a coupon), and my calendar desk frame that I showed you how to make here.

I’d still like to find a cuter and smaller chair for the desk, but the extra one from our kitchen table set works just fine for now.  Maybe in the future I’ll just recover that one, we’ll see!

So, what do you think?  Do you have a kitchen desk or an area in your kitchen that just collects junk?  Do yourself a favor and get organized!  It will make you feel so much about your space!

Posted in Decorating, Inexpensive, Organization | Tagged , , , | 3 Comments

{beer bottle decor}

Before I lose you, I’m not talking about displaying all the beer you’ve ever had on top of your kitchen cabinets like so many of my friends did in college.  Although it might have been considered really cool back then, times have changed.  We’ve traded in our beer bottles for baby bottles most days, but occasionally have some time to enjoy a few with good neighbors and friends!  Recently, my brother had some beer that came in bottles that were kind of short and stubby.  I thought they were really cute (he thought I was weird, but obliged my request by drinking a few so I could have some bottles).

I’ve been inspired by quite a few wrapped bottles on Pinterest like this one.

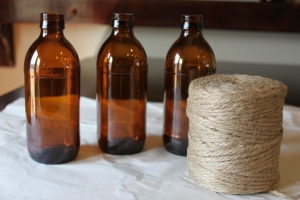
So, to make my own jute twine wrapped bottles, I needed the following supplies…

  • empty bottles (beer, wine, spaghetti sauce, pickles…possibilities are endless)
  • jute twine (purchased at Hobby Lobby with a 40% off coupon-$3.20 for 135 feet)
  • hot glue gun and glue refills (already owned, but when purchased used a 40% off coupon too)
  • a flower stem (had one on hand leftover from my wreath project)

So overall, this project cost me $3.20!  That’s my kind of project!

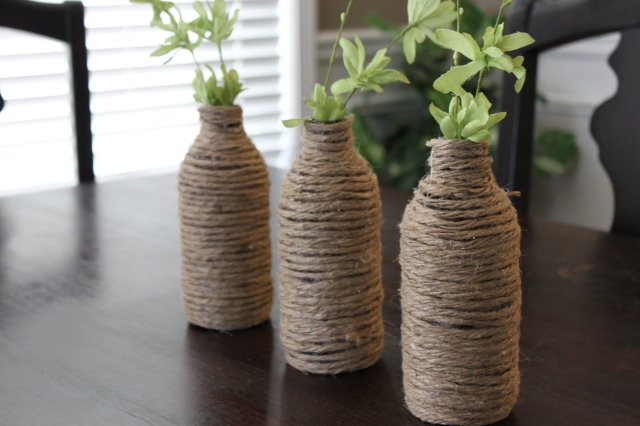
Basically I started at the bottom of each bottle and tightly wrapped the jute twine around the bottle.  I put a skinny line of hot glue to secure the jute twine down.  I used a mini glue gun on this project (still haven’t found my larger one after our move last summer) and probably used about 4 sticks on each bottle.  That may sound like a lot of glue, but they are small sticks, and I have a huge pack of them, so I didn’t mind.  You could probably just secure the jute twine with a small dot of glue every so often if your glue supply is low.

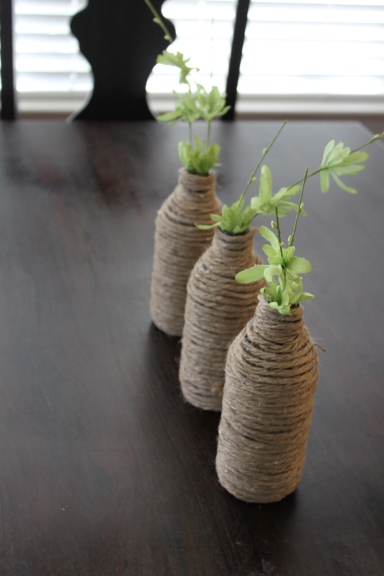
Pretty soon I had three cute little wrapped bottles.  To add some color to them, I cut a green floral stem that I had leftover from my wreath project and gave them all a new home on our kitchen table.

I’d really like to find or make a super inexpensive table runner to go underneath the bottles.  I need to be careful about the length though; little man is pulling up on everything.  I have images of babies and bottles crashing to the floor.

Oh, and I have a ton of jute twine left over.  All of a sudden I have an urge to wrap everything I own in jute twine.  It may become an addiction!  To brighten up our kitchen I’ve already done this…

and this…

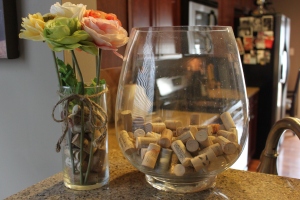
I simply tied a jute twine bow around two cylinder vases and added some bright floral stems (all 50% off at Michael’s).  I used some of our wine cork collection as a vase filler in one of them, and some polished stone in the other.  I had everything but the flowers on hand already, so that little project cost only $4.55!

I love how the bottles turned out, and when my kitchen table doesn’t have baby supplies, coupons, and papers all over it, the table now looks like this…

Have you done any projects lately that cost next to nothing?  Do you have an obsession with wrapping items around your house in jute twine?  I’d love to hear your ideas; please share!

IHeart Organizing

Featured At Serenity Now

I’ve also just linked up with these fine ladies…

on their quest to stop just pinning and start doing.  It’s…

Head on over to their blogs to see what else everyone has cooked up on this 80 degree “winter” day!

Katie @ Bower Power

Sherry @ Young House Love

Erin @ The Great Indoors

Cassie @ Hi Sugarplum!

Posted in Crafting, Decorating, Inexpensive, Organization | Tagged , , , , , , , | 6 Comments

{2 minute project}

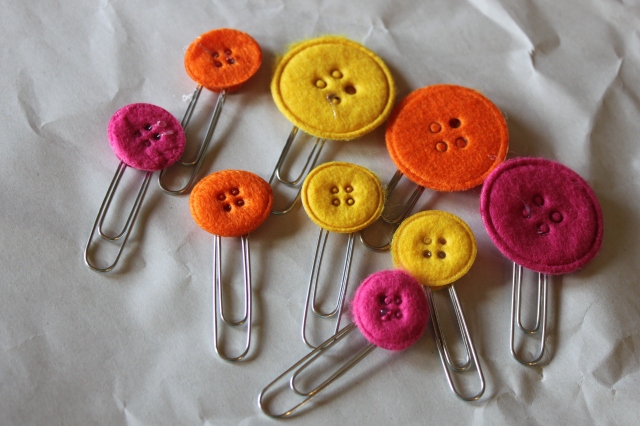
While cleaning out my kitchen desk area I have stumbled across a ton of items that I didn’t even realize where in there.  I’ll talk a little more about the kitchen desk re-org another time, but wanted to share a quick little project I did in the middle of it (I needed a de-cluttering break if you know what I mean).  So I made these…

Aren’t they cute!?

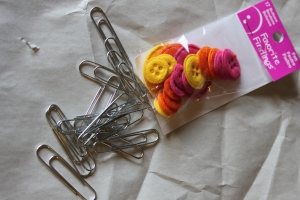
The best part?  I had all the materials on hand so this is another $0 project!  I had these cute little felt buttons (no clue why, because I don’t remember buying them, ever), a ton of paperclips, and my trusty glue gun.

To make each clip, I simply put a smaller button behind the top of the paperclip, squeezed on a dab of hot glue, then attached the larger button to the front.  Hold it for a few seconds, and it’s set.  I use paperclips a lot when I’m organizing coupons to use on shopping trips.  I simply clip all the coupons that I know I will definitely use together and put them at the front of my coupon box!  This project took me all of maybe two minutes and cost $0 since I already had all the materials on hand!  What have you recently made that cost $0?  Please share!

Posted in Crafting, Inexpensive, Organization | Tagged , , , | 1 Comment

{on top of spaghetti…}

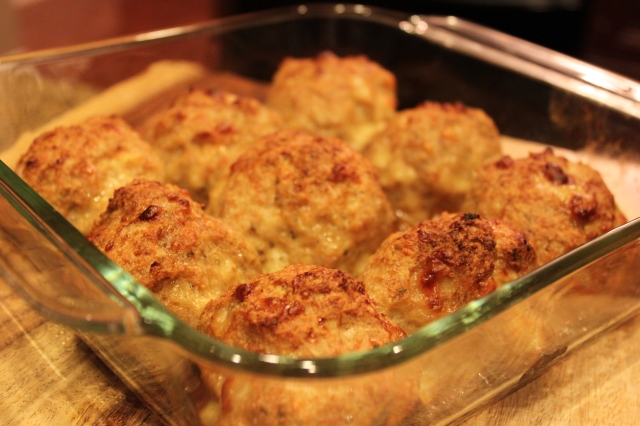
Remember a few posts back when I shared this delicious recipe for Spicy Rigatoni Sauce?  The recipe called for boneless, skinless chicken breast.  Instead, I like to make mine with some tasty chicken meatballs.  Well, I got a hankering for another batch a few days ago, and actually remembered to take some pictures this time.  I love these meatballs and the great thing is they taste great the next day too!

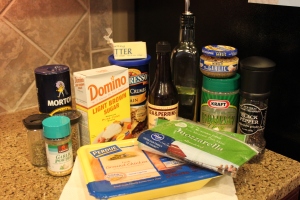
For Chicken Meatballs you’ll need:

  • package of ground chicken
  • 1/2 cup bread crumbs
  • 1/2 cup parmesan
  • 1/4 cup shredded mozzarella (or whatever shredded cheese you have on hand)
  • 2 T Worcestershire sauce
  • 1 T EVOO
  • 1 T minced garlic (buy a jar, it’s so much easier)
  • 1/2 t black pepper
  • 1/2 t salt
  • 1 T oregano
  • 1 T thyme
  • 1 t onion powder
  • 1 T brown sugar
  • 1 T butter (softened)
  • 1 egg (forgot to put the egg in the ingredient picture)

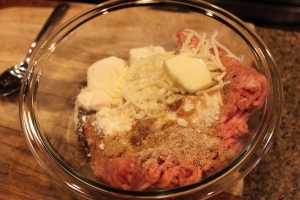
Okay.  Throw all that stuff in a bowl!

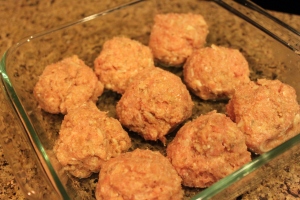
Looks delicious, right?  Wash those hands (you should have done this from the very beginning, but it wouldn’t hurt to wash again…you did just handle all kinds of packaging).  Mash all those ingredients together until it looks pretty uniform.  Once you have everything mixed together well, coat your glass baking dish with a small amount of EVOO and form meatballs.  I usually get about 9 out of each batch I make.  My meatballs are probably an inch to an inch and a half in diameter.

Pop those balls in the oven for about an hour at 350.  While they are cooking, prepare your favorite pasta sauce and uncork a bottle of red wine.  You might want to try this one here.

This is seriously one of my favorite things to eat right now.  They taste amazing and smell so good while they are cooking!  Do you have any favorite recipes?

Posted in Uncategorized | Leave a comment

{clip, clip}

It’s time for the thrill of the coupon!  I’m not talking about getting $.25 of here and $.75 off there.  I’m talking HUGE savings, my friends.
First off, some couponing lingo to help you understand this post a little better…

  • BOGO: Buy One, Get One Free
  • $.50/1: $.50 off one item
  • $.50/3: $.50 off three items
  • MFR: Manufacturer Coupon
  • IP: Internet Printable Coupon
  • eCoupon: found online, but loaded to a card (for example, Kroger Plus Card)

I live in Georgia, and the stores that I do most of my shopping are Target, Kroger, Publix, and Wal-Mart.  I do most of my grocery shopping at Kroger because I like to take advantage of their fuel point system.  For those of you not familiar with Kroger Fuel Points, for every 100 fuel points earned (typically $1 spent=1 fuel point), you get $.10 off per gallon.  For those of you with prescriptions, take them to Kroger!  You earn 50 Kroger Fuel Points for each prescription, EVERY TIME!  You can save your fuel points until you’ve accumulated a more hefty discount if you’d like (up to $1.00 off/gallon).  Kroger Fuel Points can be redeemed at Kroger Gas Stations and participating Shell Gas Stations.  All you need to redeem them is your Kroger Plus Card.  Plus, even if you don’t have enough fuel points to earn a discount, using your plus card always gets you at least $.03-$.05 off/gallon.  Hey, every penny counts!

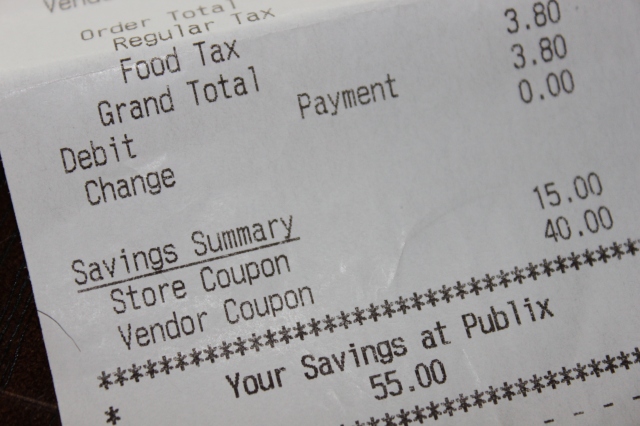
I definitely do not consider myself to be a couponing expert, but have felt a lot more confident about my shopping trips lately because of the big bucks I’ve been saving.  I mean, look at this!
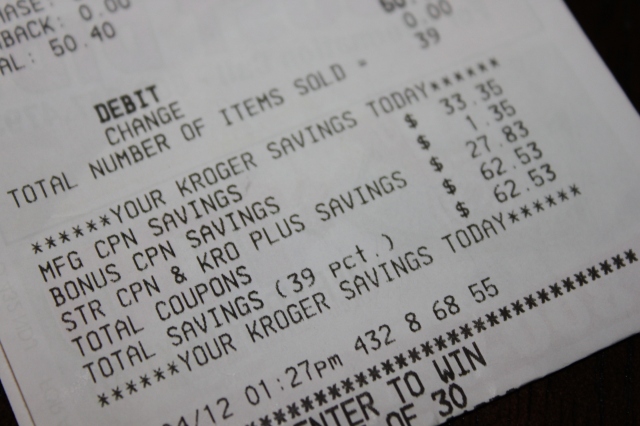
Tip #1 Take advantage of shopping at stores that double your MFR coupons.  After some research, I discovered that both Kroger and Publix double MFR coupons up to $.50 (some stores may vary by state) and also accept a store or eCoupon in addition to the MFR.  That means if I want to buy Old Spice Body Wash that is $2.99 and I have a $.50 off MFR coupon plus a $.25 off eCoupon (already loaded to my Kroger Plus Card) then I would get a total of $1.25 off of a $2.99 body wash, making my purchase $1.74.

Tip #2  Look for BOGO deals.  Let’s pretend that Kroger just happens to be running a BOGO deal on that same Old Spice Body Wash that is $2.99.  I can now use two $.50 MFR coupons plus my eCoupon giving me a total of $2.25 off (because remember, Kroger doubles my MFR coupons!)  So that gives me TWO Old Spice Body Washes for only $.74!  Publix is really good about BOGO deals too.  Check the store ads for the items on sale and at BOGO each week!

Tip #3  Devote some time to clipping coupons from the Sunday paper each week and studying some websites devoted to helping us common folk interpret coupons and sales.  My favorite coupon site is this one here.  I also like to go to this website every week to upload eCoupons to my Kroger Plus Card.  This one is good for IP coupons.  So is this one.  And this one.  And this one.  Moral of the story…there are a TON of websites out there to help you figure out how to save big bucks.  Do yourself a favor and get familiar with them, now!  Your wallet and your husband 🙂 will thank you!

Tip #4  You do not need 20 boxes of cereal that you don’t eat just because they are BOGO and you have a ton of coupons for them.  Don’t clip coupons and definitely don’t use coupons for items that you do not use!  That’s just a silly waste of money!  If you are compelled to just clip all coupons or you maybe have a coupon for something that you really don’t need, go find the item in the store and leave it there for someone who really does need it.  I do that all the time (not sure how the employees feel about that, but I think it’s the nice thing to do).  I also do this if I realize that a coupon that I have is about to expire in a day or two and I really don’t need the item before that time.

Tip #5  Actually look through the store ads for the stores that you shop at every single week.  From week to week different stores run different sales.  A lot of stores, like Publix and Wal-Mart for example will even price match if you bring in the competitor’s ad.  Publix even takes it a step further by honoring competitor coupons too!  In most states, the ad schedule is:

  • Sunday: Target and Kroger
  • Monday: Wal-Mart
  • Tuesday: Publix

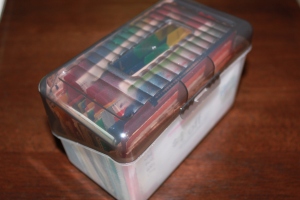
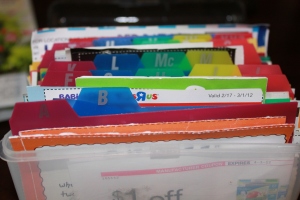
Tip #6  Stay organized and bring your coupons with you every time you leave the house!  Your coupons are doing you no good sitting on your kitchen counter while you’re at the store.  I keep all of my coupons in a hard plastic, index card box with alphabetical dividers.  I purchased the box and the dividers at Wal-Mart for less than $3.00.  I’ve tried several methods including a coupon binder with plastic page protectors that I just did not like using and a canvas coupon file system from Target, but it only had 5 sections and it was difficult to keep track of my coupons.  So far, my index card box has been the best organizer for me, but everyone is different!  Each Sunday, after I clip my coupons, I simply go through each letter, file new coupons, and purge expired ones.  I also use this box to keep major store coupons like Bed, Bath & Beyond, Babies R Us, Michael’s, Hobby Lobby, etc.
Tip #7  If you have the time, and I highly suggest you make the time, sit down with your coupons and write out a meal plan and a grocery list for the week.  I typically shop every week, especially for items we use a lot (milk, baby food, produce), and maybe once every three weeks I make a big shopping trip.  If I have a coupon or I know the store is running a sale on an item I make note of that on my list and I put that coupon aside (to make for an easier check out).  If I prepare a list ahead of time that usually means that I’ve put aside all of the MFR, IP, and store coupons that I plan to hand over to the cashier.  I can put those at the front of my coupon box and just hand over the stack when I’m checking out.  This helps check out run a lot smoother and also helps to avoid mean stares from customers behind you that are thinking, “oh no, crazy coupon lady is in front of me.”

That’s pretty much all I’ve got for ya!  Again, I by no means consider myself to be a couponing expert.  I’ve simply been feeling pretty good about my total savings lately after shopping and thought I’d share the love.  I’ve even had a few cashiers comment on how much I’m saving, which makes me feel pretty good too.  Please let me know if this has helped you out at all!

What about you?  What’s the most you’ve saved with coupons and sales lately?  If you have any tips or tricks, please share!

Posted in Inexpensive, Organization | Tagged , | 1 Comment

{we really can’t wait til daddy comes home!}

Shane has been in Australia for the better part of the past month.  We missed celebrating Valentine’s Day and his birthday together!  Needless to say, Jackson and I are ready for daddy to come home, and can’t wait til next week when he heads back to the good U-S-of-A :).  I took this picture of Jackson and I to send to Shane while he’s been away.

I don’t have a tripod, so I just set the camera on the floor and hoped for the best with my self timer beeping away.  Luckily Jackson reacted to the sounds the timer made!  I’m entering the I Clicked it Up a Notch February Photography Contest.  Click the button to see some other great entries!  Do you have a favorite photograph you took in the month of February?  If so, you should enter!
Click It Up A Notch

Posted in Uncategorized | 7 Comments